Getting Started with Python
If you are new to Python or want to get started with Python, this page is for you. I will go over the basics of Python and how to get started with it. I will also share some tips and tricks that I have learned over the years.
This page assumes you have little knowledge about how to work with Python or need a refresher. Perhaps you just got used to working with Jupyter Notebooks and are looking for the next step. Once you get the hang of it, you can visit the other pages to understand how to structure, test and maintain a model.
Learning the Basics
If you are completely new to Python or need a refresher, I recommend to go through:
- Intro to Programming Course to understand the basics of programming.
- Python Course which is a very to the point course for Python.
- Pandas Course to understand Pandas as it is the bread and butter of Python in basically any industry.
- (Optional) Machine Learning Course but only do so if you plan on using Machine Learning in your projects.
I recommend Kaggle because it is an entirely free platform (thus no annoying paywalls) and by familising yourself with Kaggle, it can be a great place to get started with your own projects given there are plenty of datasets over there to experiment with.
Once you have finished these courses, the number one advice I want to give is that you absolutely should not enroll in any form of “Python Certification”, watch someone else code or read books about “How to Program in Python”. Learning Python is not about learning the syntax, it is about learning how to solve problems with Python. This is something you can only learn by doing and not by courses, watching videos or reading books how to do it. Exceptions are higher level content such as model architecture.
I recommend to start with a project that you are interested in and start working on it. All of the projects listed below came out of a personal need and have allowed me to really develop my Python skills especially through building in open-source, receiving feedback from others occasionally.
With the Finance Toolkit I wanted to see if I could improve my own fundamental analysis through Python while in the meantime getting the hang of NumPy and Pandas.

With the Finance Database I wanted to see if I could create a database that would allow me to find the products that I could then use with the functions of the Finance Toolkit.

With Personal Finance I wanted to understand my spending habits and how much money would be left by the end of the month to use for investing. This also allowed me to experiment with Excel and PowerBI integrations.

Installing and Working with Python
To get started, acquire the Anaconda Distribution and use a Jupyter Notebook as follows:
- Go to https://www.anaconda.com/download and install the application.
- Open up the “Anaconda Navigator” and launch the “Jupyter Notebook”. Alternatively, use
jupyter notebookin the command line. - Create a new notebook and start coding!
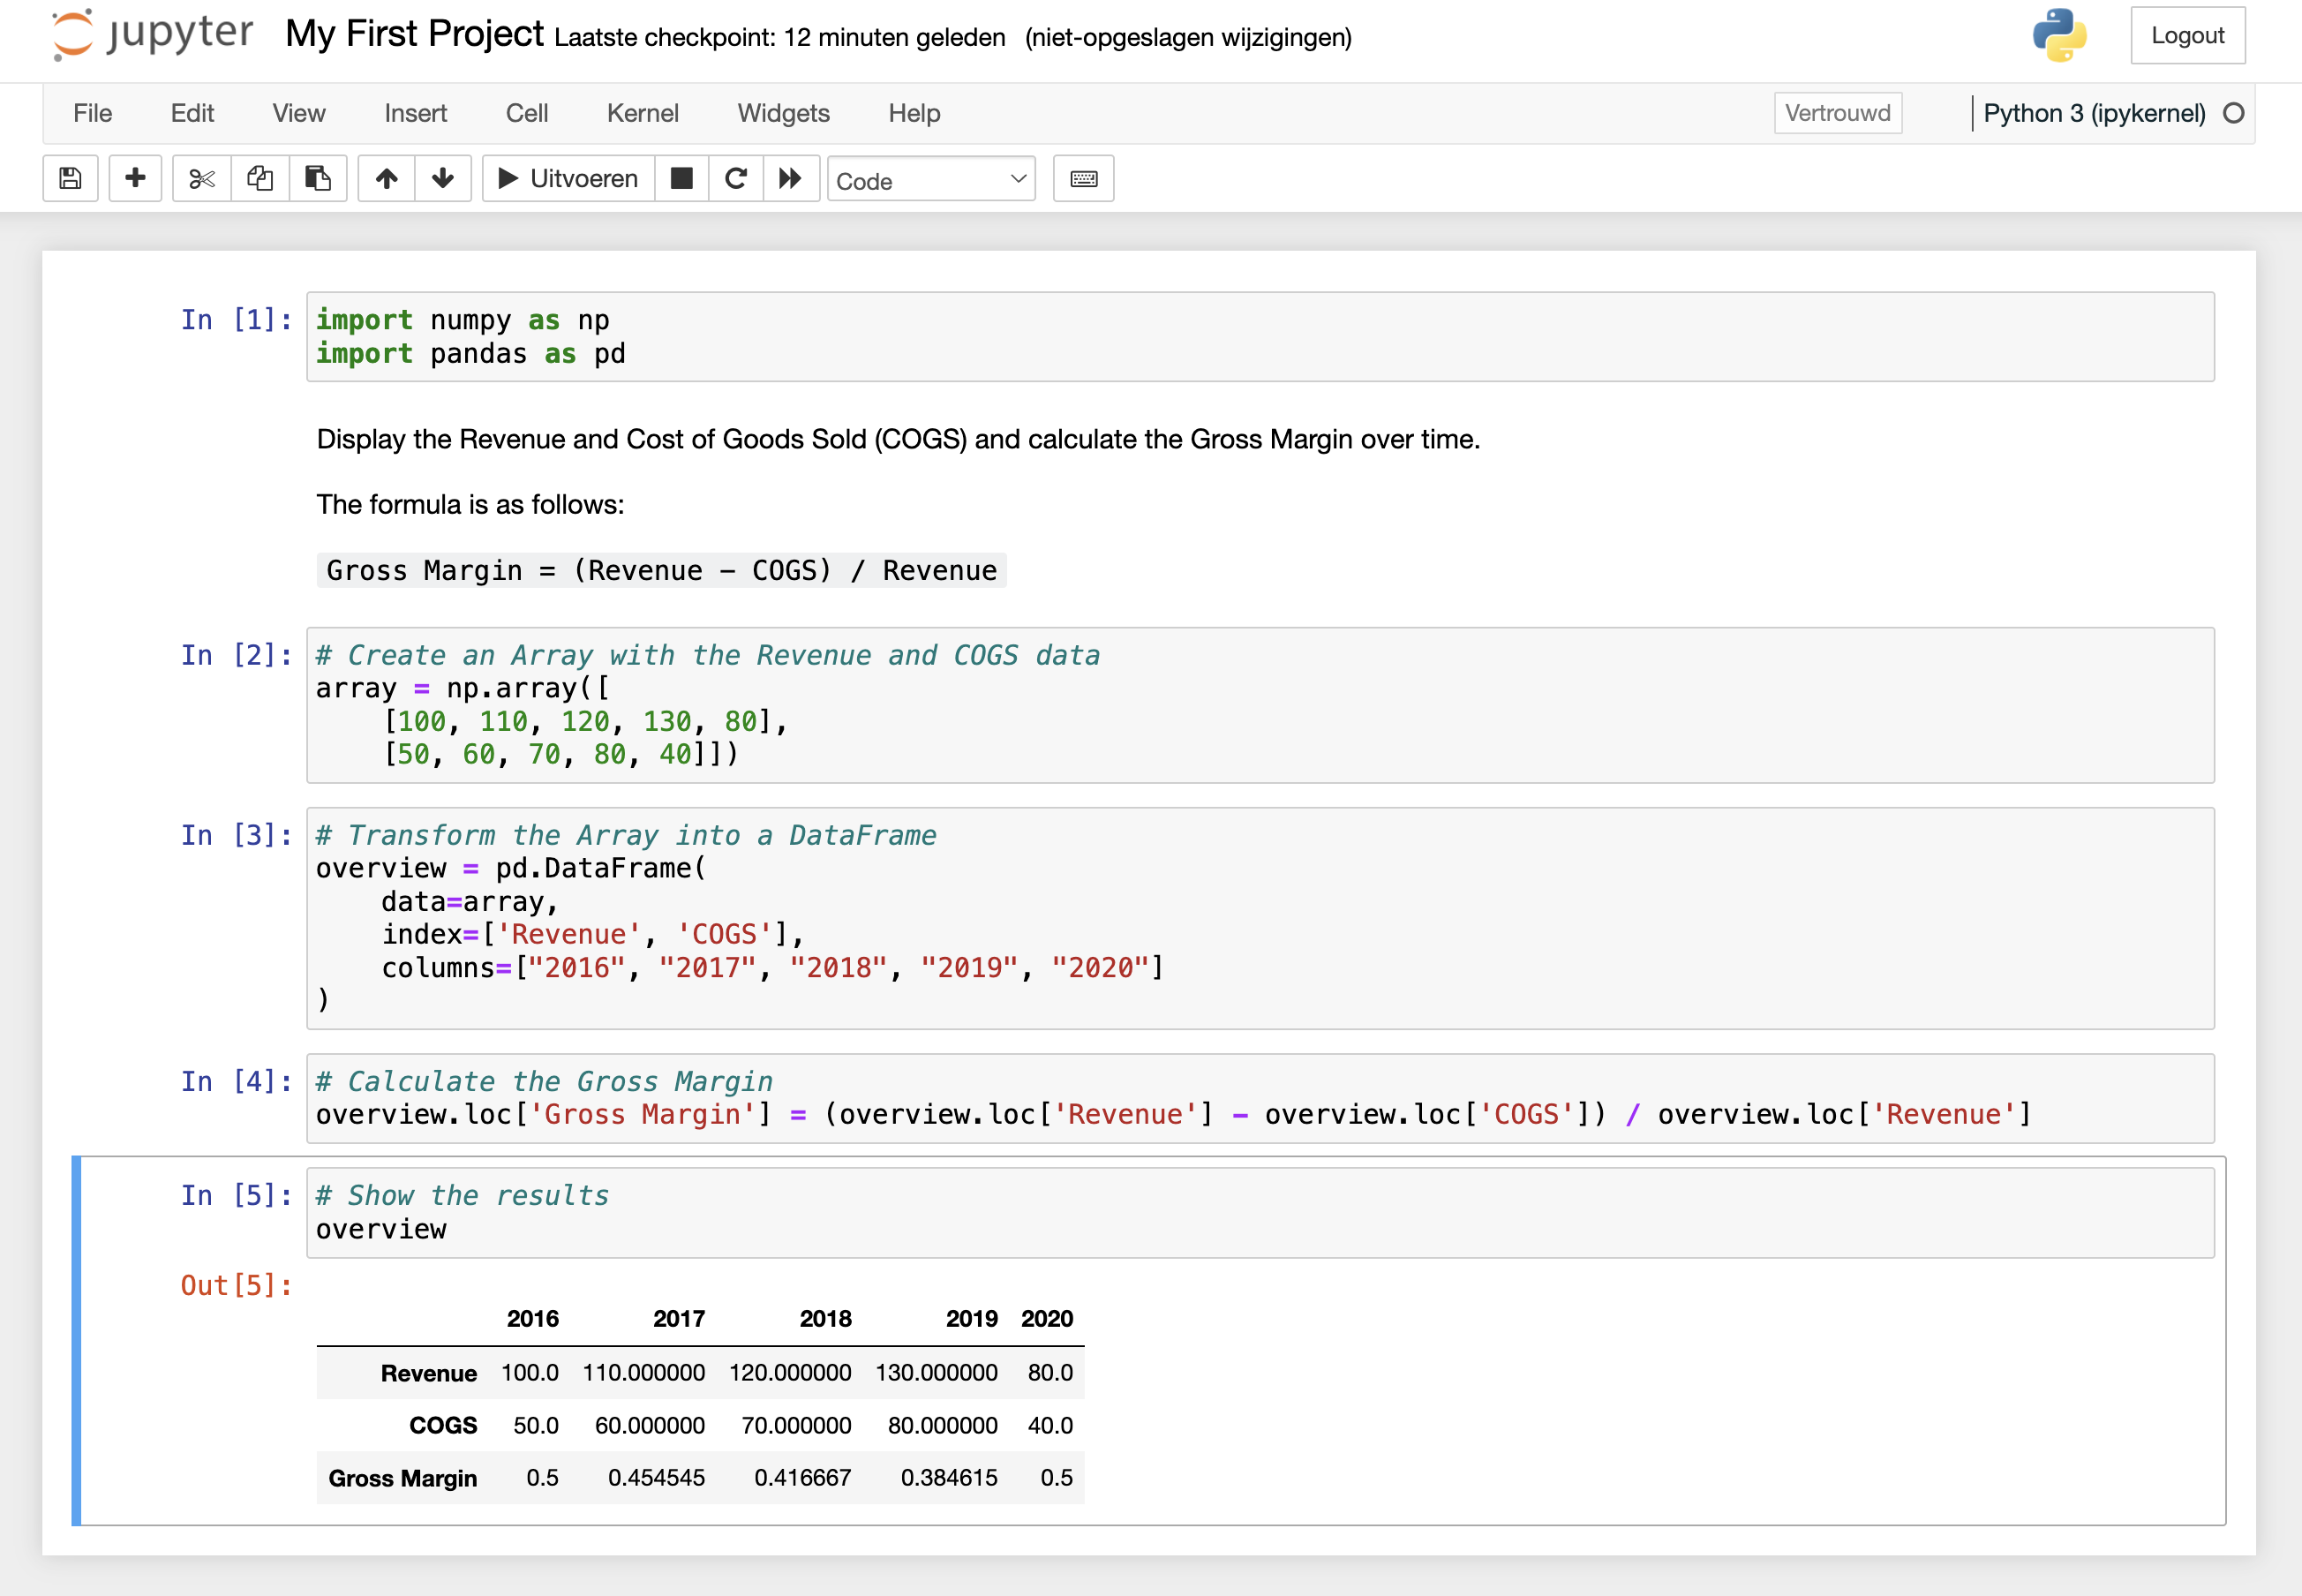
Jupyter Notebooks should be your go-to until your familiarized yourself well with the syntax. See an example of how such a Notebook could look like below.
One of my first projects was just a combination of Jupyter Notebooks (see here). This was a University project in which we had to use Python to perform Pairs Trading. It is by no means perfect but it demonstrates the elegance of a Jupyter Notebook and how it can be used to get started.
Why work with Jupyter Notebooks?
The reason Jupyter Notebooks are so popular is because you can easily run code in blocks and see the output immediately. This allows you to experiment with code and see what it does. Once you are more familiar with the syntax, you can start using a code editor such as Visual Studio Code or PyCharm. These editors also support Jupyter Notebooks as the Notebooks remain the go-to for debugging functions and testing code.
Some tips to focus on while learning Python:
- Work primarily with the largest packages which are NumPy, Pandas and SciPy. In basically any project, these packages tend to be there. I would not recommend trying to work with Machine Learning packages such as Scikit-learn or TensorFlow until you have a solid understanding of the basics. The last thing you want is constantly copy + pasting code from StackOverflow without understanding what it does.
- Acquire (financial) datasets to experiment with. For example visit Kaggle or use the Finance Toolkit. You can do so through
pip install financetoolkitor in a Jupyter Notebook use!pip install financetoolkit. The examples as found here should get you going quickly and as all of it relies on NumPy, Pandas and SciPy, you should be able to work with the data rather quickly. - Google any issue you don’t understand. Someone will definitely have had the same issue and there will be a solution for it. This is also were the open-source community shines given that there is a solution for nearly everything.
- Definitely use ChatGPT whenever you are stuck with your code. While ChatGPT (or any similar application) can write all of your code, the quality tends to vary a lot and in the end: code is read much more often that it is written. Therefore, I recommend to use ChatGPT to fix mistakes and get a general idea of how to solve a problem but then write the code yourself. Don’t limit yourself by not using Artificial Intelligence (AI) because it could be seen as “cheating” or not being your own work.
- Don’t bother with dependency management, linters, pytest, styling and more. Until you have a solid understanding of the basics, it will only confuse you. Even though these are all things that are very crucial to have once you develop a proper model it will only complicate things for you when you are still learning.
Looking for Project ideas? Google and ChatGPT should have plenty. Also, don’t be discouraged if it has already been created. For example there are multiple applications similar to my Personal Finance tracker but I have made it the way it gives me the most insights.
The Next Steps
Once you got the hang of working with Python, you can start utilising the following to level up your programming experience and quality.
- Install a Code Editor like Visual Studio Code or PyCharm. These help in designing actual models through
.pyfiles and can work together. As you have used packages like Pandas and NumPy, these are built through these code editors given that multiple files interact with each other. - Create a public or private project on a platform like GitHub. This is a platform where 100+ million developers come together to contribute to the open-source community and manage Git repositories (e.g. my own here). A platform often used within companies is Azure DevOps or BitBucket which shares similar functionality. See a guide about GitHub here.
- Download Git to version control your project. Through
git add,git commit -m Initial Commitandgit pushyou can create a version history making it possible to understand how the project has evolved and, possibly, revert changes that shouldn’t have been made. Using Git is extremely important and on the other pages I assume you have this setup.
Once you have done these steps it’s time to start setting up your project. Visit Setting up your Project to continue!